The world of book art is a captivating realm where creativity knows no bounds. For centuries, book artists have been pushing the limits of this medium, experimenting with various techniques, materials, and designs to create truly stunning pages. Whether you’re a seasoned artist or a beginner, book art offers a unique opportunity to express yourself, tell a story, and showcase your imagination. In this article, we’ll delve into the basics of book art, exploring the fundamental principles, techniques, and materials that will help you unlock your creative potential.
Understanding the Fundamentals of Book Art
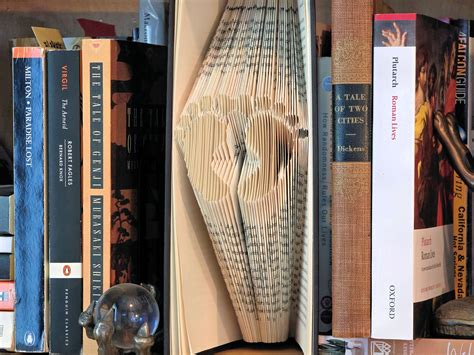
Book art is an interdisciplinary field that combines elements of visual art, literature, and design. It involves creating artworks that are either inspired by books or incorporate books as a medium. Book artists often experiment with various forms, including sculptural books, altered books, and handmade books. To get started, it’s essential to understand the basic elements of book art, including:
- Paper: The foundation of book art, paper comes in various textures, colors, and weights. From delicate rice paper to sturdy cardboard, the type of paper you choose will significantly impact your artwork.
- Ink and Pigments: Book artists use a range of inks and pigments to add color, texture, and depth to their pages. These can include watercolors, acrylics, and natural dyes.
- Binding Techniques: The way you bind your pages together can greatly enhance the overall aesthetic of your book. Common techniques include sewn bindings, adhesive bindings, and stapled bindings.
- Typography: The arrangement of text on a page can greatly impact the viewer’s experience. Book artists often use typography to convey meaning, create visual interest, and guide the reader’s eye.
Essential Techniques for Book Art
To create stunning pages, book artists employ a range of techniques that can be learned and practiced. Some essential techniques include:
- Collage: Combining disparate materials, such as paper, fabric, and found objects, to create intricate and layered compositions.
- Stamping and Printmaking: Using handmade stamps or printing plates to add repetitive patterns, textures, and designs to your pages.
- Drawing and Illustration: Incorporating original drawings, illustrations, or paintings to bring your pages to life.
- Paper Marbling: Creating unique, swirling patterns on paper using a combination of ink, water, and specialized techniques.
Exploring Materials and Tools
Book artists are known for their creativity and resourcefulness when it comes to materials and tools. Some common materials used in book art include:
- Paper scraps: Salvaged from old books, maps, or music sheets, these can add a touch of nostalgia and history to your pages.
- Fabric and fibers: Incorporating textiles, threads, or yarns can introduce new textures, colors, and dimensions to your artwork.
- Found objects: Natural materials like leaves, twigs, or flowers can be used to create unique embellishments and designs.
- Inks and paints: Experimenting with different ink and paint types can help you achieve a range of effects, from subtle watercolors to bold, graphic marks.
When working with book art, remember that the process is just as important as the final product. Experimenting with different materials, techniques, and tools can help you develop your unique style and voice.
Step-by-Step Guide to Creating a Handmade Book
Creating a handmade book can be a rewarding and meditative experience. Here’s a basic step-by-step guide to get you started:
Step 1: Plan Your Book
Determine the size, shape, and theme of your book. Consider the materials you'll use, the binding technique, and the overall design.
Step 2: Prepare Your Pages
Cut, fold, and prepare your paper according to your design. You can use a variety of paper types, colors, and textures to create visual interest.
Step 3: Add Content and Embellishments
Use your chosen techniques, such as collage, drawing, or stamping, to add content and embellishments to your pages. Experiment with different materials and tools to achieve unique effects.
Step 4: Assemble and Bind Your Book
Use your chosen binding technique to assemble and bind your pages together. Make sure the binding is secure and the pages lie flat.
Troubleshooting Common Challenges
As with any creative pursuit, book art can present its own set of challenges. Here are some common issues and solutions:
- Warped or buckled pages: Use a bone folder or a similar tool to gently flatten and smooth out your pages.
- Ink bleeding or feathering: Experiment with different ink types or use a fixative to prevent bleeding or feathering.
- Binding difficulties: Practice your binding technique, and consider using a binding jig or a sewing frame to help you achieve a professional-looking finish.
Conclusion
Book art is a dynamic and expressive medium that offers endless possibilities for creativity and self-expression. By understanding the fundamental principles, techniques, and materials, you can unlock your full potential and create stunning pages that showcase your unique voice and style. Remember to experiment, take risks, and push the boundaries of what’s possible. With book art, the journey is just as important as the destination.
What is the best type of paper for book art?
+The best type of paper for book art depends on the specific technique and desired effect. Consider using a high-quality, acid-free paper with a smooth finish, such as cotton or linen paper.
How do I prevent my book pages from becoming too thick or bulky?
+To prevent your book pages from becoming too thick or bulky, consider using lighter-weight papers, minimizing the amount of embellishments, and using a binding technique that allows for flexibility and movement.
Can I use digital tools and software to create book art?
+Yes, you can use digital tools and software to create book art. Consider using graphic design software, such as Adobe InDesign or Illustrator, to create digital layouts and designs. You can also use a printer or a digital cutting machine to produce your pages.