The allure of a warm, fluffy donut, fresh from the oven, is a temptation few can resist. For those with a sweet tooth and a desire to create something magical in their own kitchens, the journey to making the perfect homemade donuts begins with a simple yet versatile recipe. Welcome to the world of Hook & Press Donuts, a unique approach to donut making that combines the best of traditional techniques with modern simplicity. In this comprehensive guide, we’ll delve into the heart of what makes Hook & Press Donuts special and provide you with an easy-to-follow recipe to create these delectable treats in the comfort of your own home.
Understanding Hook & Press Donuts
Before we dive into the recipe, it’s essential to understand the basics of Hook & Press Donuts. The term “Hook & Press” refers to a specific method of shaping donuts that involves using a combination of a hook-like tool (or a creative substitute) and a gentle pressing motion to achieve the donut’s characteristic ring shape. This technique allows for a more controlled and uniform donut shape, making it perfect for both beginners and experienced bakers looking to refine their donut-making skills.
Essential Ingredients and Tools
To embark on this donut-making adventure, you’ll need the following ingredients and tools:
Ingredients:
- 2 cups of all-purpose flour
- 1⁄2 cup of granulated sugar
- 1⁄2 cup of whole milk
- 2 teaspoons of active dry yeast
- 1⁄4 teaspoon of salt
- 2 large eggs
- 4 tablespoons of unsalted butter, melted
- Flavorings such as vanilla extract (optional)
Tools:
- A large mixing bowl
- A whisk
- A rubber spatula
- A dough hook attachment for a stand mixer (or a strong arm for manual kneading)
- A clean work surface for kneading
- A hook-like tool or a donut pan for shaping
- A deep frying pan or a deep fryer
- A thermometer
- Paper towels for draining
The Recipe: A Step-by-Step Guide
Step 1: Activate the Yeast
In a small bowl, combine the warm milk (around 100°F to 110°F) and yeast. Stir gently to dissolve the yeast, and let it sit for about 5 to 10 minutes, or until the mixture becomes frothy. This step is crucial as it activates the yeast, ensuring your donuts will rise beautifully.
Step 2: Mix the Dough
In a large mixing bowl, whisk together the flour, sugar, and salt. In a separate bowl, whisk together the eggs, melted butter, and any desired flavorings like vanilla extract. Once the yeast mixture is frothy, add it to the egg mixture and whisk until well combined. Gradually pour the wet ingredients into the dry ingredients and mix until a shaggy dough forms.
Step 3: Knead the Dough
Using a stand mixer with a dough hook attachment, knead the dough for about 5 to 7 minutes, until it becomes smooth and elastic. If kneading by hand, this process may take approximately 10 minutes. The dough should be slightly sticky but not overly so. If necessary, add a small amount of flour to achieve the right consistency.
Step 4: Let the Dough Rise
Place the dough in a lightly oiled bowl, cover it with plastic wrap or a damp towel, and let it rise in a warm, draft-free place for about 1 hour, or until it has doubled in size.
Step 5: Shape the Donuts
Once the dough has risen, punch it down to release the air. On a lightly floured surface, roll out the dough to about 1⁄2 inch thickness. Using your hook-like tool or a donut cutter, cut out the donuts. If using a donut pan, simply cut out the donuts to fit the pan’s shapes. You should be able to get about 6 to 8 donuts, depending on the size.
Step 6: Let the Donuts Rise Again
Place the shaped donuts on a parchment-lined baking sheet, leaving about 1 inch of space between each donut. Cover them with plastic wrap or a clean towel and let them rise for another 30 to 45 minutes, or until they have puffed up slightly.
Step 7: Fry the Donuts
Heat about 2 to 3 inches of oil (such as vegetable or peanut oil) in a deep frying pan or a deep fryer to 350°F. Once the oil is hot, carefully place the donuts in the oil, a few at a time, to avoid crowding. Fry for 1 to 2 minutes on each side, or until the donuts are golden brown. Use a thermometer to maintain the oil temperature.
Step 8: Drain and Cool
Using a slotted spoon, remove the donuts from the oil and place them on a paper towel-lined plate to drain excess oil. Let the donuts cool for a few minutes before glazing or dusting with sugar.
Tips and Variations
- Glazing: Prepare a glaze by whisking together powdered sugar and milk until smooth. Dip the cooled donuts in the glaze for a sweet, sticky coating.
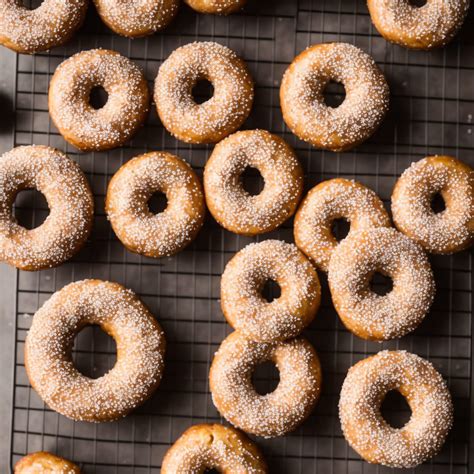
- Sugar Dusting: Simply dust the warm donuts with granulated sugar for a classic look and taste.
- Creative Fillings: Once the donuts are cool, you can fill them with your favorite fillings, such as jam, custard, or chocolate.
Conclusion
Making Hook & Press Donuts at home is a rewarding experience that combines traditional baking techniques with a fun and creative shaping process. With this recipe and a little practice, you’ll be on your way to crafting delicious, professional-quality donuts that are sure to impress friends and family alike. Remember, the key to perfect donuts is patience and attention to detail, so don’t be discouraged if your first batch doesn’t turn out exactly as expected. Happy baking!
What is the best type of flour to use for making donuts?
+All-purpose flour is the most commonly used and recommended type of flour for making donuts due to its balanced protein content, which helps in achieving the right structure and texture.
How do I ensure my donuts are light and fluffy?
+To achieve light and fluffy donuts, it’s crucial to not overmix the dough, ensure the yeast is activated properly, and maintain the correct oil temperature during frying.