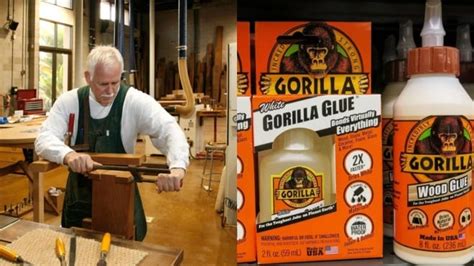
The versatility of Gorilla Glue, a product that has become a staple in many DIY enthusiasts’ and professionals’ toolkits alike. While Mark Singer, a renowned artist known for his portraits and editorial illustrations, may not be the first person that comes to mind when thinking of DIY projects or Gorilla Glue, his approach to creative problem-solving can indeed inspire innovative uses for this adhesive. In this guide, we will explore how one might use Gorilla Glue in a DIY project, drawing inspiration from the artistic and resourceful mindset of individuals like Mark Singer, who embody creativity and ingenuity in their work.
Introduction to Gorilla Glue
Before diving into the DIY guide, it’s essential to understand the basics of Gorilla Glue. This powerful adhesive is known for its strength and versatility. It comes in various forms, including original, super glue, epoxy, and more, each designed for specific applications. Understanding which type of Gorilla Glue to use for your project is crucial for achieving the desired outcome.
Selecting the Right Gorilla Glue for Your Project
- Original Gorilla Glue: Ideal for bonding wood, stone, and other porous materials. It’s perfect for projects that require a strong, yet somewhat flexible bond.
- Gorilla Super Glue: Best for plastics, metals, and other non-porous surfaces. It dries clear and is great for projects where you need a strong, invisible bond.
- Gorilla Epoxy: Provides a strong, permanent bond and is resistant to high impact. It’s excellent for projects that require a lot of strength and durability.
DIY Guide: Creating a Wooden Planter with Gorilla Glue
For this project, we’ll be using the original Gorilla Glue to create a beautiful wooden planter. This guide can be adapted to various woodworking projects, showcasing the glue’s versatility.
Materials Needed:
- Wooden planks (for the planter’s sides, bottom, and top)
- Original Gorilla Glue
- Wood clamps
- Safety gloves
- Sandpaper
- Waterproof sealant (optional)
Step-by-Step Instructions:
Prepare the Wood: Cut the wooden planks into the required sizes for the sides, bottom, and top of the planter. Ensure all cuts are precise and smooth.
Assemble the Planter: Apply a thin, even layer of original Gorilla Glue to the ends of the planks that will form the sides of the planter. Assemble the sides, and then attach the bottom plank. Use wood clamps to hold everything in place while the glue dries. Follow the instructions on the Gorilla Glue packaging for application and drying times.
Attach the Top: Once the sides and bottom are secure, you can attach the top plank. Apply Gorilla Glue and clamp it down. If you want the top to be removable, consider using hinges instead.
Sand and Finish: After the glue is completely dry, remove the clamps and sand the entire planter to smooth out any rough edges or splinters. If desired, apply a waterproof sealant to protect the wood from the elements.
Plant Your Greenery: With your planter complete, you can now fill it with soil and plants. Choose plants that fit the size and style of your planter, and enjoy the fruits of your labor.
Tips and Tricks for Working with Gorilla Glue
- Always read the instructions: Different types of Gorilla Glue have specific application and drying times. Understanding these will ensure your project turns out as expected.
- Use in a well-ventilated area: Gorilla Glue can emit strong fumes, so it’s crucial to work in an area with good airflow.
- Prepare your surface: Clean and dry surfaces ensure a stronger bond.
- Apply the right amount: Too little glue may not provide a strong enough bond, while too much can create a mess. Start with a small amount and add more as needed.
Conclusion
Mark Singer’s creative approach to his work can inspire us to think outside the box when it comes to DIY projects and the use of versatile products like Gorilla Glue. By understanding the different types of Gorilla Glue and how to apply them, you can tackle a wide range of DIY projects with confidence. Whether you’re a seasoned DIY enthusiast or just starting out, the key to successful projects is often found in the details and the willingness to explore new ideas and techniques.
What are the different types of Gorilla Glue?
+Gorilla Glue comes in various forms, including original, super glue, epoxy, and more, each designed for specific applications such as bonding wood, metals, plastics, and other materials.
How do I choose the right Gorilla Glue for my project?
+Choosing the right Gorilla Glue involves considering the materials you’re working with and the type of bond you need. For example, original Gorilla Glue is ideal for wood and porous materials, while super glue is better for plastics and metals.
What safety precautions should I take when using Gorilla Glue?
+When using Gorilla Glue, ensure you’re working in a well-ventilated area, wear safety gloves to protect your skin, and follow the instructions on the packaging for application and drying times to avoid any potential risks.